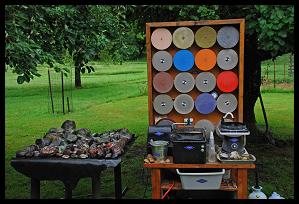
Main Home

AKG Mods

Beyer Mods

Denon Mods

Grado C-Pads

Grado HF-1 Mods

Grado Woody/Cable

Sennheiser Mods

Stax Mods


Archive Pics

Headphone Deals

Headphone Stands

Wood Identity Pics

Interconnects, Extensions, Adapters, etc

Shipping & FAQ


C-Pads V7 Circumaural Beyer velour pads on adapters for adding comfort, soundstage, etc to fit Grado headphones. They are fronted with black sound transparent speaker cloth, for further wild hair protection against "grattle".

     
New V7 I've created a new version of C-Pads that I feel take the best aspects of the old Z-G normal and ported into one new version. The ports are shaped like little ears to catch and extract bouncing sound waves. This gives what I feel, a truer to the original Grado sound. It also makes choosing C-Pads easier as there is only one choice, kind of. You still need to choose between black and Mahogany and silver or black pads!

 
Pads are currently available in both black and silver. Black pads are $10 more and you will get silver if black is not paid for at the time of order. Back plates of black and Mahogany (below) are standard color choices, email if you desire another type of wood (additional charge) for availability. All custom woods must be approved by me prior to purchase.

"V7 SR" fit SR-60, 80, 100, 125, 200, 225, 300, 325, 325i, MS-1, MS-2, MS2i.

"V7 HP/PS/RS" fit HF-1, GS-1000, PS-1, RS1&2, MSPro, HP1000 (and all SR too).

$
Option (additional charge) $

Adjusting Headband for Better Fit of C-Pads

I've found that bending your headband is a pretty darn easy way to get your C-Pads sitting on your head properly. In the above left picture, think of the white line as the stock band and the red as the adjusted band. There is a band of metal inside the leather (or vinyl) cover. Keep in mind you don't want to reef on it, but you do want to bend it beyond springing back to stock which does take some force. If need be, start slow and repeat numerous times.

In the right picture, you'll need to straighten this section of the metal a bit in the green dotted area. Do this by putting your thumbs in the yellow dot area and bend up where the red arrows show. This widens the band. Next, grasp a yellow dot on either side and bend towards lower arrow, then repeat on other side. Keep in mind you're going for the red shape in the left picture. In both pics, the band shown has already been adjusted, so you can also use that as a guide.

It may take a few attempts to get it right, but once you get it fitting better you'll get the idea and be able to make more minor adjustments. It's not brain surgery, you can do it if you just do it. I recommend this over anything below...

C-Pads Installation Instructions

Both the Z-G and Z-S "SR" Series have a fitted slot for the driver face edge to fit into, opposite of ear side.

1] Remove Grado pads (as in bowls or flats). Don't' remove the white or black fine driver face cloth.
2] Fit driver holder over driver face and align and hold in position.
3] Grasp back of driver housing with both hands fingers (screen side edges) and put your thumbs on either side of soundboard on ear side of C-pads, near the opening (covered with black grill cloth).
4] You should be able to press the adapter onto the driver face if aligned properly. Since every driver is very slightly different in size, the adapters may go on easy or require a more firm pressing.
5] You may hear a slight snap or feel it going snuggly into place. Check backside to see if the driver face edges are even all the way round in the fitted area.

Ask for help if needed. Pads will settle over time and are replaceable if the need occurs.

To Remove C-Pads

1] Grasp back of adapter towards and near the inside (on wood, not edges) with both hands.
2] Put thumbs directly on driver face (through grill cloth) and push with thumbs while pulling with fingers towards you. Use care to stop pushing when C-Pad releases so you don't dislodge grill cloth from soundboard.

Adapter will pull off fairly easy with this method.

HP/RS/PS Series

I've decided to fit these in a slightly different way than the others. As seen in pic to the right, I've put in two beads of "tacky tape", which is a putty that is sticky. Simply put driver faces in place and follow instructions above. Instead of snapping into place, the tacky tape holds the adapter to the driver face. It's not a permanent bond, they can be taken off and on. It isn't as convenient as snap in for taking off, but with different driver face sizes and as to not scratch the wood or metal, I've decided this is the best solution. If the tacky tape wears out from taking off and on regularly, it can be purchased at many stores in small quantities. Some call it "Blu-Tak" or "Adhesive Putty". Cut it lengthwise into spaghetti noodle size and press in as it was originally when received. Cleans up by dobbing, like when picking up gum. Takes a few moments and best to do it slow.

Email: info@headphile.com