 |
|
|
|
|
|
|
|
|
|
|
|
|
|
|
|
|
|
|
|
|
|
|
|
|
|
|
|
|
|
|
|
|
|
|
|
|
|
|
|
|
|
|
|
|
|
|
|
|
|
|
|
|
|
|
|
|
|
|
|
|
|
|
|
|
|
|
|
|
|
|
|
|
|
|
|
|
|
|
|
|
|
|
|
|
|
|
|
|
|
|
|
|
|
|
|
|
|
|
|
|
 |
|
 |
|
 |
|
 |
|
 |
|
|
|
|
|
|
|
|
|
|
|
|
|
|
|
|
|
|
|
Contents of this page in order
Senn Woodies & Leather Headband, Senn V2 Cables, 590 Series & Senn Woody Install Instruction
Build time and status is explained on home page, please read.
|
|
|
|
|
|
|
|
|
|
|
|
 |
|
 |
|
 |
|
|
|
|
|
|
|
Leather headbands currently not available (at this time, sorry). These will fit HD580/600/650/6XX/660S, but must be installed by me. Bummer I know, but to get the tight fit on the ends, just the way it is. Quality plush black deerskin. Ship headphones to me, minus cable and Senn box and I'll do what I do and ship them back with a new look. I'll give shipping address after purchase is made.
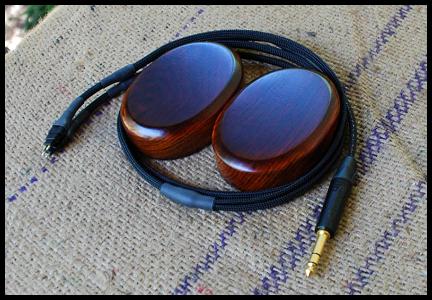
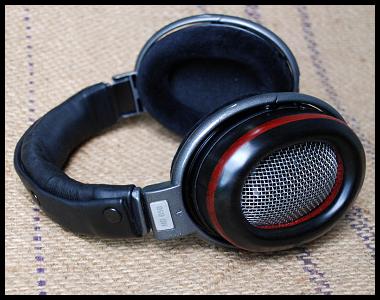
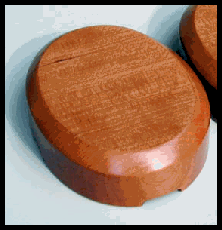
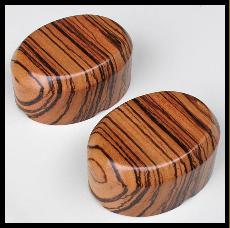
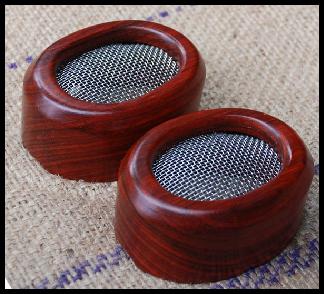
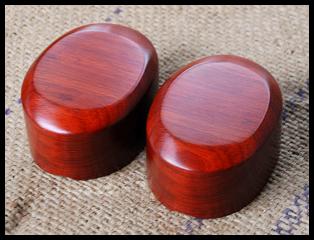
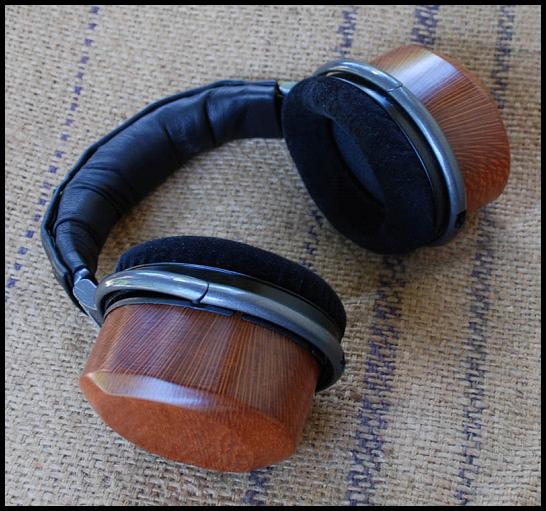
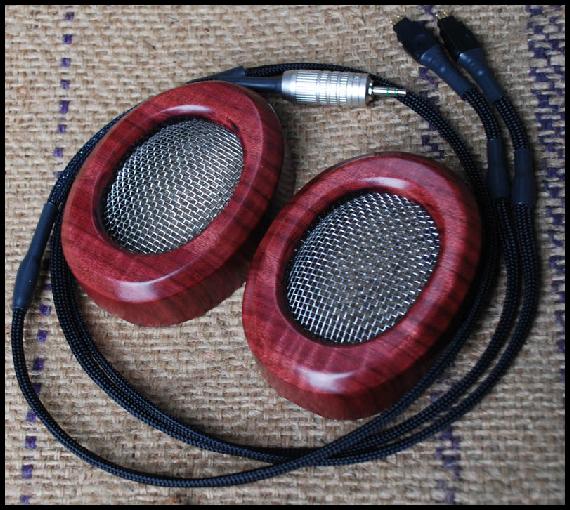
Senn woodies help lift what I hear as a lush veil and provide a more balanced frequency range to my ears. Overall -impact- of sound increase in closed versions. The standard depth brings the music in your face closer while the deeper depth woodies create a nice balance of soundstage, chamber hall like depth and bring out the high end better. I prefer woody on, rather than open, with both 580's and 600's. More of a "club" feel and rock can. For 650's I like either full screen (virtually cosmetic only) or Deep version for a chamber hall feel. Some like standard depth on 650's also
no experience for me personally on 6xx or 660S.
If you'd like me to install woodies, I will do it in exchange for your nice stock screens, just pay the shipping to get them here and back.
It is easy to pop off your existing screens and push/screw these in place. Woody's will have pilot holes for the included brass wood screws (4 per woody). Senn Woody installation instructions at bottom of page
.
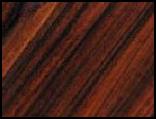
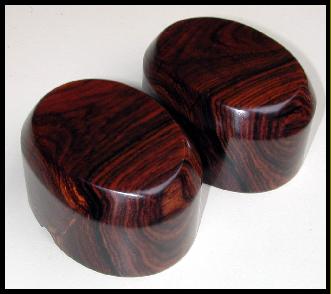
Pics of different woods on Wood ID page. Deep version currently available in Paduak, Flame Maple, Cocobolo, Korina, Cherry, Black Walnut, Zebra, Koa and Purple Heart. Possibly others (ask and I'll check).
|
|
|
|
|
|
|
|
 |
|
 |
|
 |
|
 |
|
|
|
|
|
|
|
|
|
 |
|
 |
|
 |
|
|
|
|
 |
|
 |
|
|
|
|
|
|
 |
|
|
|
|
|
 |
|
|
|
|
 |
|
|
 |
|
|
|
|
|
|
|
|
|
 |
|
 |
|
 |
|
|
|
|
|
|
|
|
|
|
|
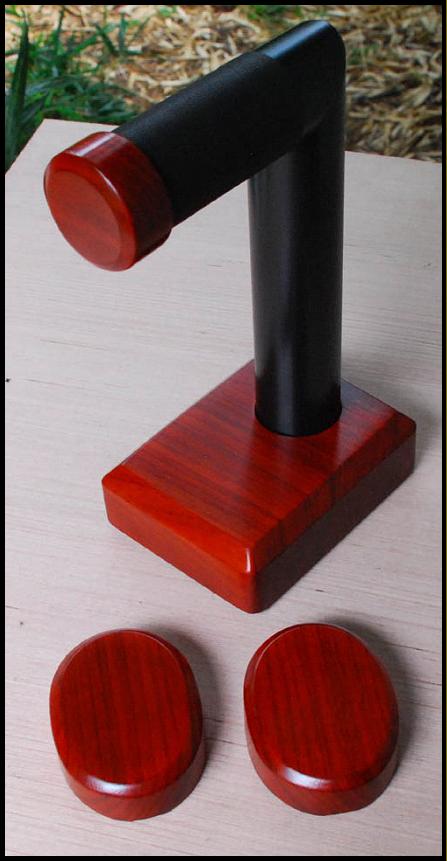
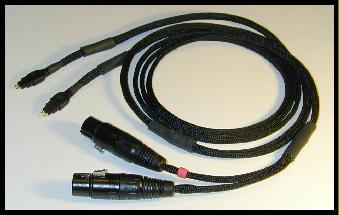
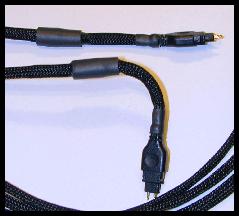
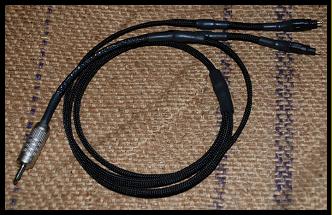
Senn V2 replacement cables for HD-580, HD-600 and HD-650/6XX/660S headphones. I use brand new true Senn 650 connectors. These will also fit HD25 with a little DIY (next paragraph).
For HD25
Remove old cable out of headband, and out of side post (screwed in). Take cups off headband, turn over then insert so cable entry is on bottom (instead of on top). You get even signal wire length that way, which is good IMO.
Wider soundstage, better instrument separation, and overall transparency/musicality, is what customers are saying about the V2 cable. Probably the most neutral Senn cable available, hear what your drivers are capable of
I like to describe it as cleaning a dirty window, so you can clearly see (hear) what's there. Senn's are sleepy, they need to be woken up IMO. These are the ticket...
Also upgradeable in either BlackCopper, BlackMax20, BlackCrystal, BlackTop or BlackGold inner configurations.
Outside covering is a special soft sleeving that I've found is very low in microphonics, unlike other replacement cables that use standard noisy and stiff Techflex. The connector splice uses multiple layers of adhesive heat shrink, to hold up for the entire life of the cable.
These V2 have been popular since their inception, thus I've not changed the V2 internal formula over the years. I suspect these could easily be the best value in aftermarket Senn cables for how well they perform. Six inner Black Series varieties to choose from too :-)
|
|
|
|
|
|
|
|
|
|
|
|
|
|
|
|
|
Totally unsolicited customer comment* (complete stranger) about Senn V2 purchase...
Have around 50 hours on the Senn V2 now and I have to say I have never known any piece of audio equipment or accessory which has given such a staggering difference in listening quality.
To say the cable has lifted the veil on the Sennheiser is an understatement. It's like night and day. Clarity, gorgeous but not false soundstage, and bass, well the bass is so true and deep.
And contrary to what some headphilers seem to have suggested it doesn't in anyway change the nature of the Sennheisers. It just gives a pure transparency and honesty to the music that is not fatiguing in the slightest, not a hint of aggression or harshness.
Sorry if this is a ramble Larry, I'm not an audiophile but I like to think I know what good sound is. And just from experience I had some Senn HD650s last year which I upgraded with xxxxxx at $185. IMHO The Senn V2 leaves the xxxxxx dead in the water.
Honestly, never thought music could sound this authentic. It must be art!
*Edited for spelling, paragraphs and blanked out "other" cable name.
|
|
|
|
|
|
|
|
|
|
|
|
|
|
|
|
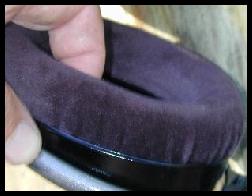
First step is to remove your earpads. Place your finger under inside of pad and tug up. That side of the pad will snap loose. Turn phones around and repeat on the other side and top and bottom until pad is free. There will also be a thin piece of foam that goes between the ear pad and the driver housing, usually it will come out with the ear pad. If not, pull it out and repeat for opposite all steps for other ear pad.
|
|
|
|
|
|
|
|
|
 |
|
|
|
|
|
|
|
|
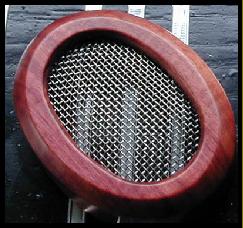
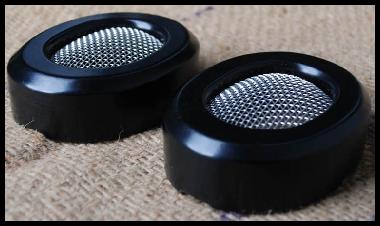
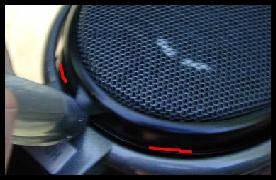
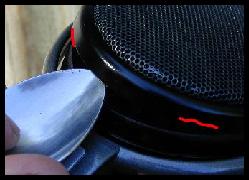
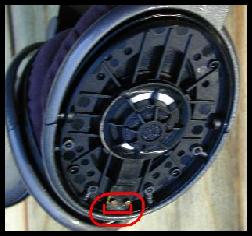
Next it is time to remove the stock screens. Locate edge of screen (red lines) and place spoon under the lip. Gently pry up until screen is loose and remove. It is very easy.
|
|
|
|
|
|
|
|
|
 |
|
|
|
|
|
 |
|
 |
|
|
|
|
|
|
|
|
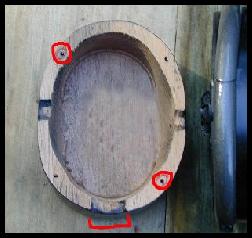
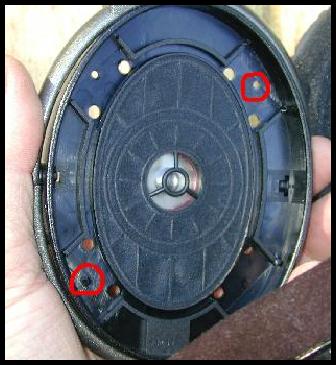
Now that your screens and pads are off, the woodies can be installed. The woodies have three indentations on the bottom lip. The half rectangles in red at the bottom of each pic need to line up with each other (at bottom of headphone where cable enters).
You will be inserting the woody into the plastic lip that the screen fit over. The red circles in the left picture show the pre drilled pilot holes that you will be screwing into (the other two aren't circled). The interior of your woodies will have more build work done to them than these old pics, but the pilot holes and indents will be the same as photos. Your woody interior will look slightly different than pics.
|
|
|
|
|
|
|
|
|
 |
|
 |
|
|
|
|
|
|
|
|
|
|
|
Once both woodies are on and you've decided on damping or not, you can screw the woodies on with the provided screws.
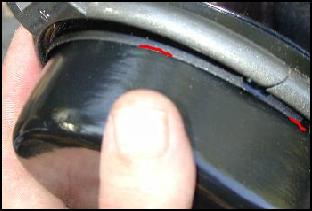
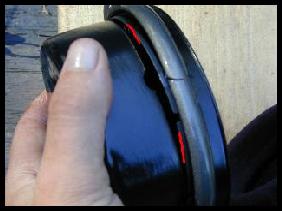
The woodies have four holes pre drilled. There are four holes in the driver housing, two are shown (above) in red. The other two holes are opposite. Screw in the holes nearest cable opening first, then the one above and across.
I like to use a cotton rag to hold the cup as to not "burn in" a finger print. Do not tighten a single screw only, tighten each a little until all are starting to feel tight. Do not over tighten! Best to snug up the lower screws first (cable entry side).
Damping
You have a choice to dampen the interior of the cups or leave them as received. If not damped, you will get reflecting sound waves which may or may not be desirable to you (chamber hall affect). I personally like damping behind the driver only, while leaving the ends of the cups alone. Stick with the slightly deeper middle circle when damping using cotton, foam, blu-tack or other. It's really up to you and experimenting is part of the fun. Just don't over tighten your screws. If you do strip a hole, cut some tooth picks with scissors so they fit in holes and put in some wood glue then let dry.
|
|
|
|
|
|
|
|
|
 |
|
|
|
 |
|
|
|
|
|
|
|
|
|
 |
|
|
|
|
|
|
|
|
Once both woodies are installed, insert the thin foam back into the side you just tightened the screws or replace it with sound transparent cloth (some use lady Nylons). Insert pad and firmly push down around the entire pad to snap it back in (multiple places to snap in). If you have a question on installation, don't hesitate to email for an answer. Please enjoy your woody!
|
|
|
|
|
|
|
|
|
 |
|
|
|
|
|